Summary
- Using Safari instead of Chrome on a Mac has advantages like better performance, improved energy usage, and better support for Apple services and devices.
- You can easily import Chrome data to Safari to retain bookmarks, browsing history, and other data.
- Consider getting familiar with Safari features like tab groups and profiles, Distraction Control, iCloud sync, and more before you make the jump.
Jumping from an old browser to a new one can be intimidating, but there are lots of upsides to moving to Safari from Chrome. Here’s what to know to make the transition smoother.
Why Make the Shift?
Safari is Apple’s native browser that comes preinstalled on your Mac. It comes with a host of advantages over Chrome for the average Mac user. The browser is highly optimized for Apple devices, which means it can run faster and requires less energy (perfect for MacBook users on battery power).
The interface is arguably sleeker and more intuitive, and I find that organization, synchronization, and keeping my work and personal browsing separated is more convenient than it is with Chrome. If you use multiple Apple devices, then syncing your tabs, bookmarks, and other elements across everything makes browsing a seamless experience. Using other native Apple apps like Passwords is also easier to do with Safari.
I was a Chrome user for as long as I can remember, so my decision to try out Safari came with a fair bit of skepticism. But once I gave it a chance, Safari hooked me in with its features, ease of use, and performance. If you’re on the cusp of making the switch from Chrome to Safari, here are a few things to keep in mind to make the transition smooth.
Set Safari as Your Default Browser
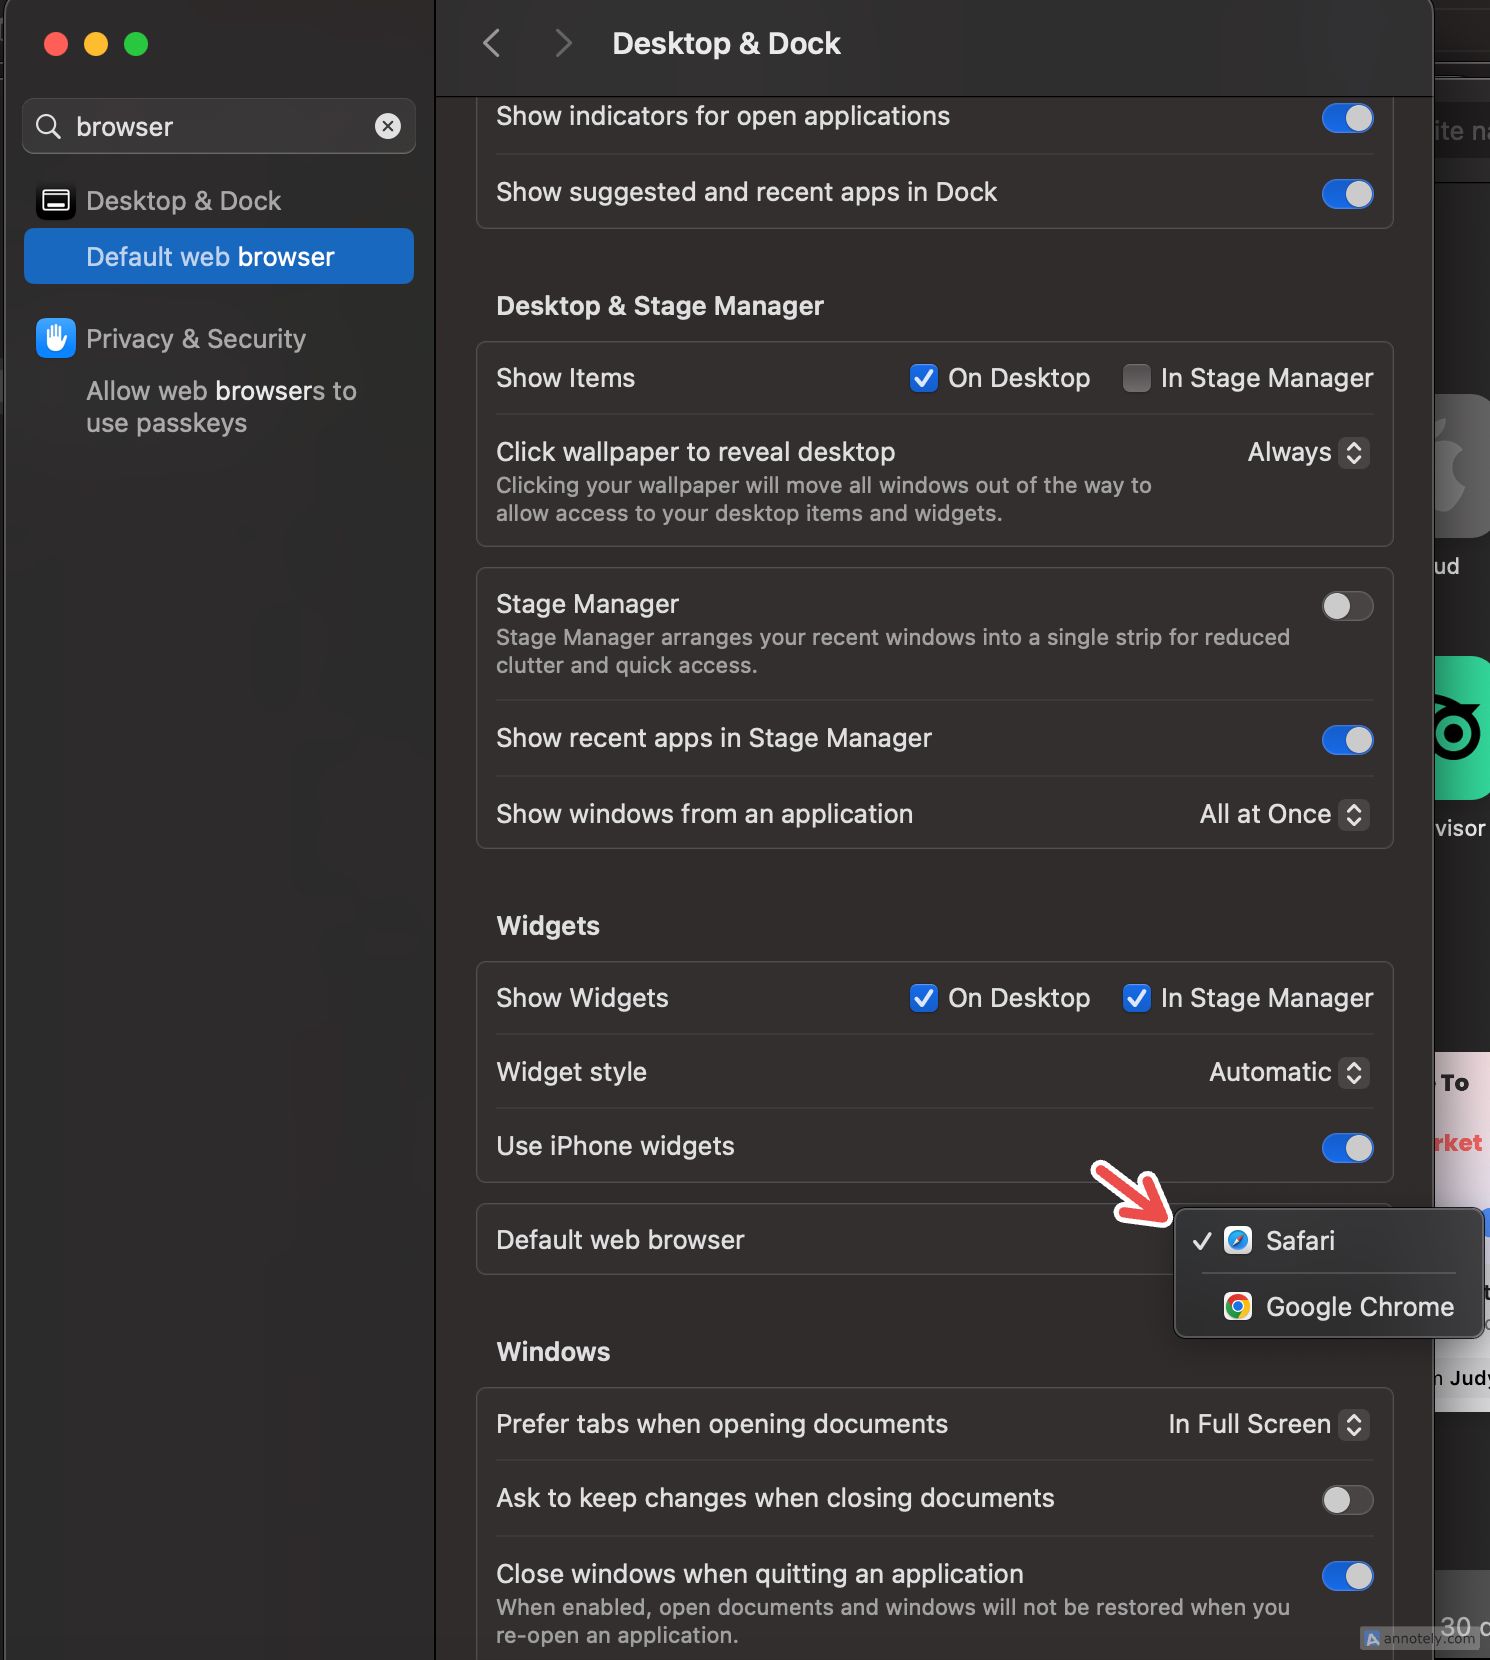
The first step in transitioning to Safari is to ensure it’s your go-to web browser instead of Google Chrome when opening web links. Setting Safari as your default browser is a simple switch. To do this, go to your Mac’s Settings > Desktop & Dock > Default Web Browser. From the drop-down menu, pick “Safari.”
You can also choose to open Safari when you log in so that your transition is made easier. Find the Safari app icon on your dock and right-click on it. Now, tap Options > Open at Login. If you’re a sucker for organization, you might want to assign Safari to a specific desktop too.
Import Your Google Chrome Data
One thing that could hold you back from making the jump to Safari (beyond familiarity or routine) could be the amount of data you have stored in the form of bookmarks, passwords, or history.
If it is your first time opening Safari on your Mac, a message on the start page asks if you want to keep your imported items. Select “Keep Your Imported Items” to automatically import your data from Google Chrome.
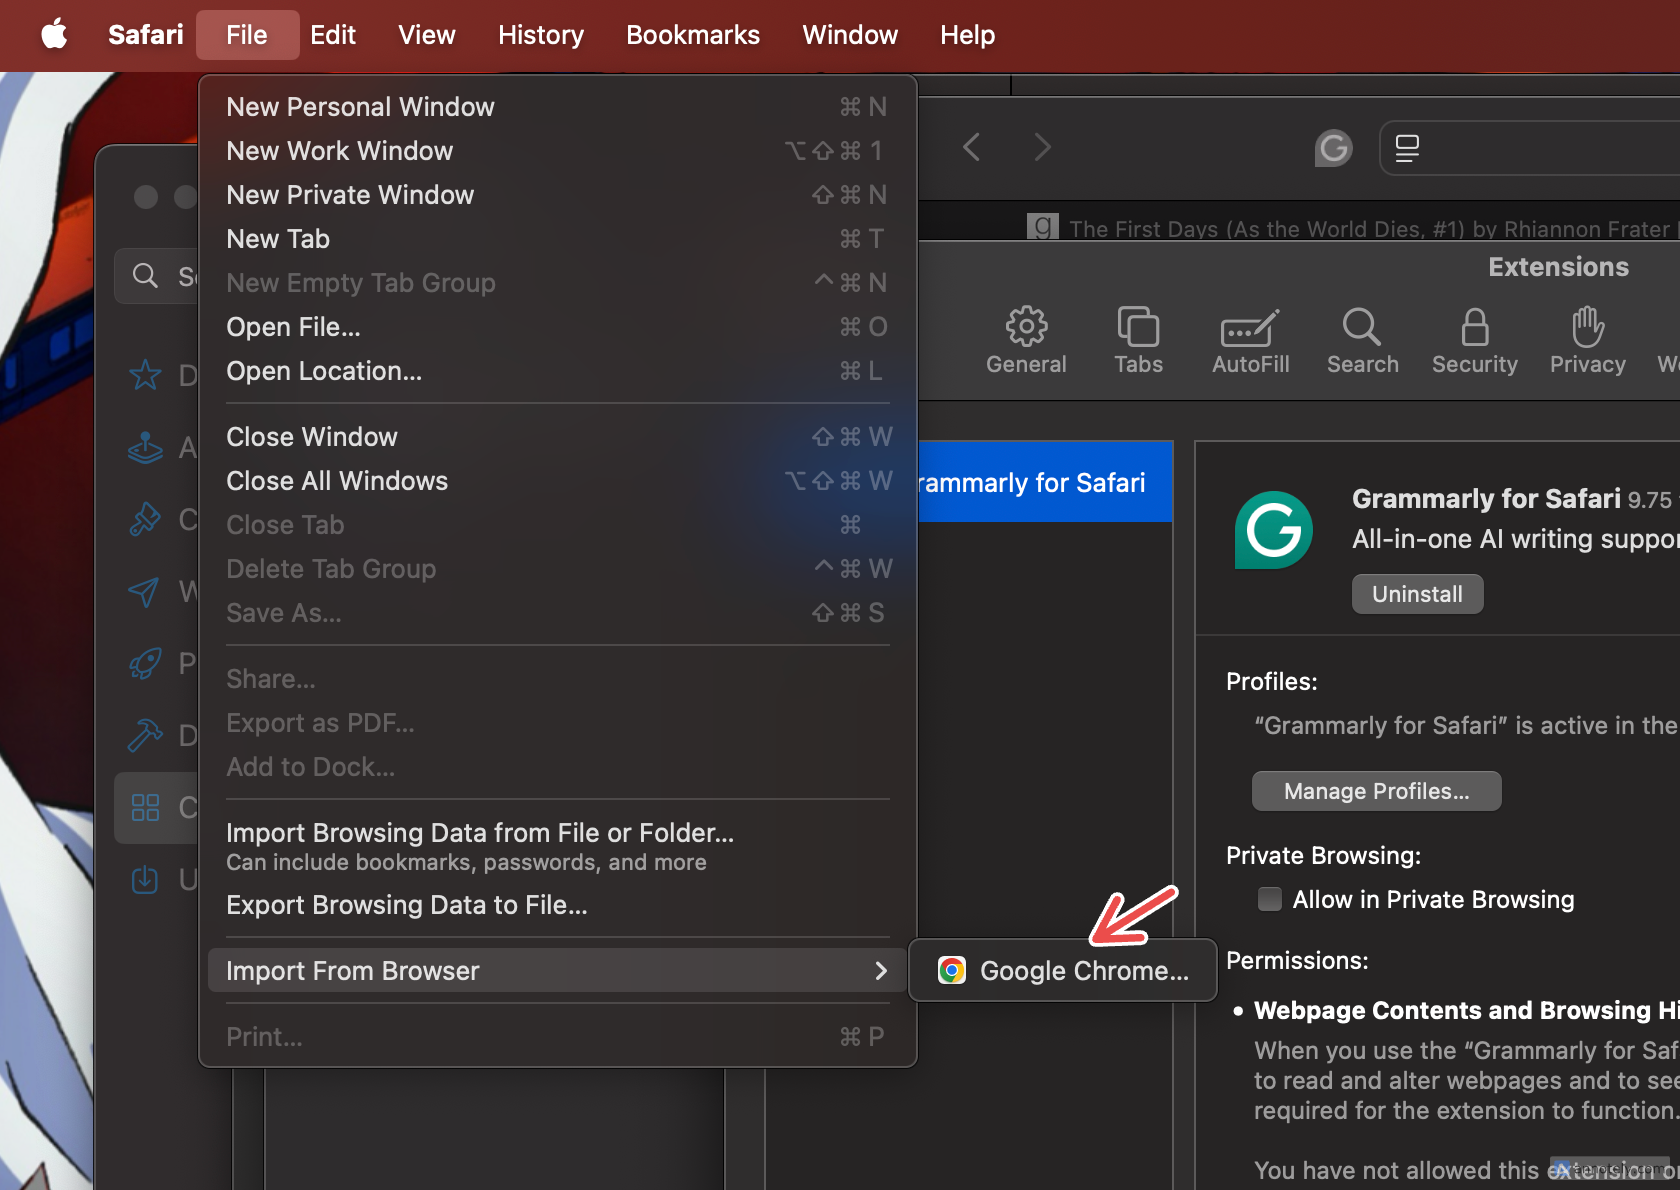
You can still import data if it’s not your first time opening Safari. With Safari open, click File > Import from… > Google Chrome.
To complete the transfer, make sure that you quit the Chrome app if you have it open.
Install Safari Extensions
Extensions are an important part of any browser experience. Chrome comes with a huge library of extensions, but these cannot be automatically transferred as part of your data to Safari. However, Safari comes with its own collection of free and paid browser extensions that you can use for a better experience.
Unlike Chrome, Safari extensions are also installed as apps. Also unlike Chrome, Safari has a more limited selection of extensions which is perhaps the browser’s biggest downside.
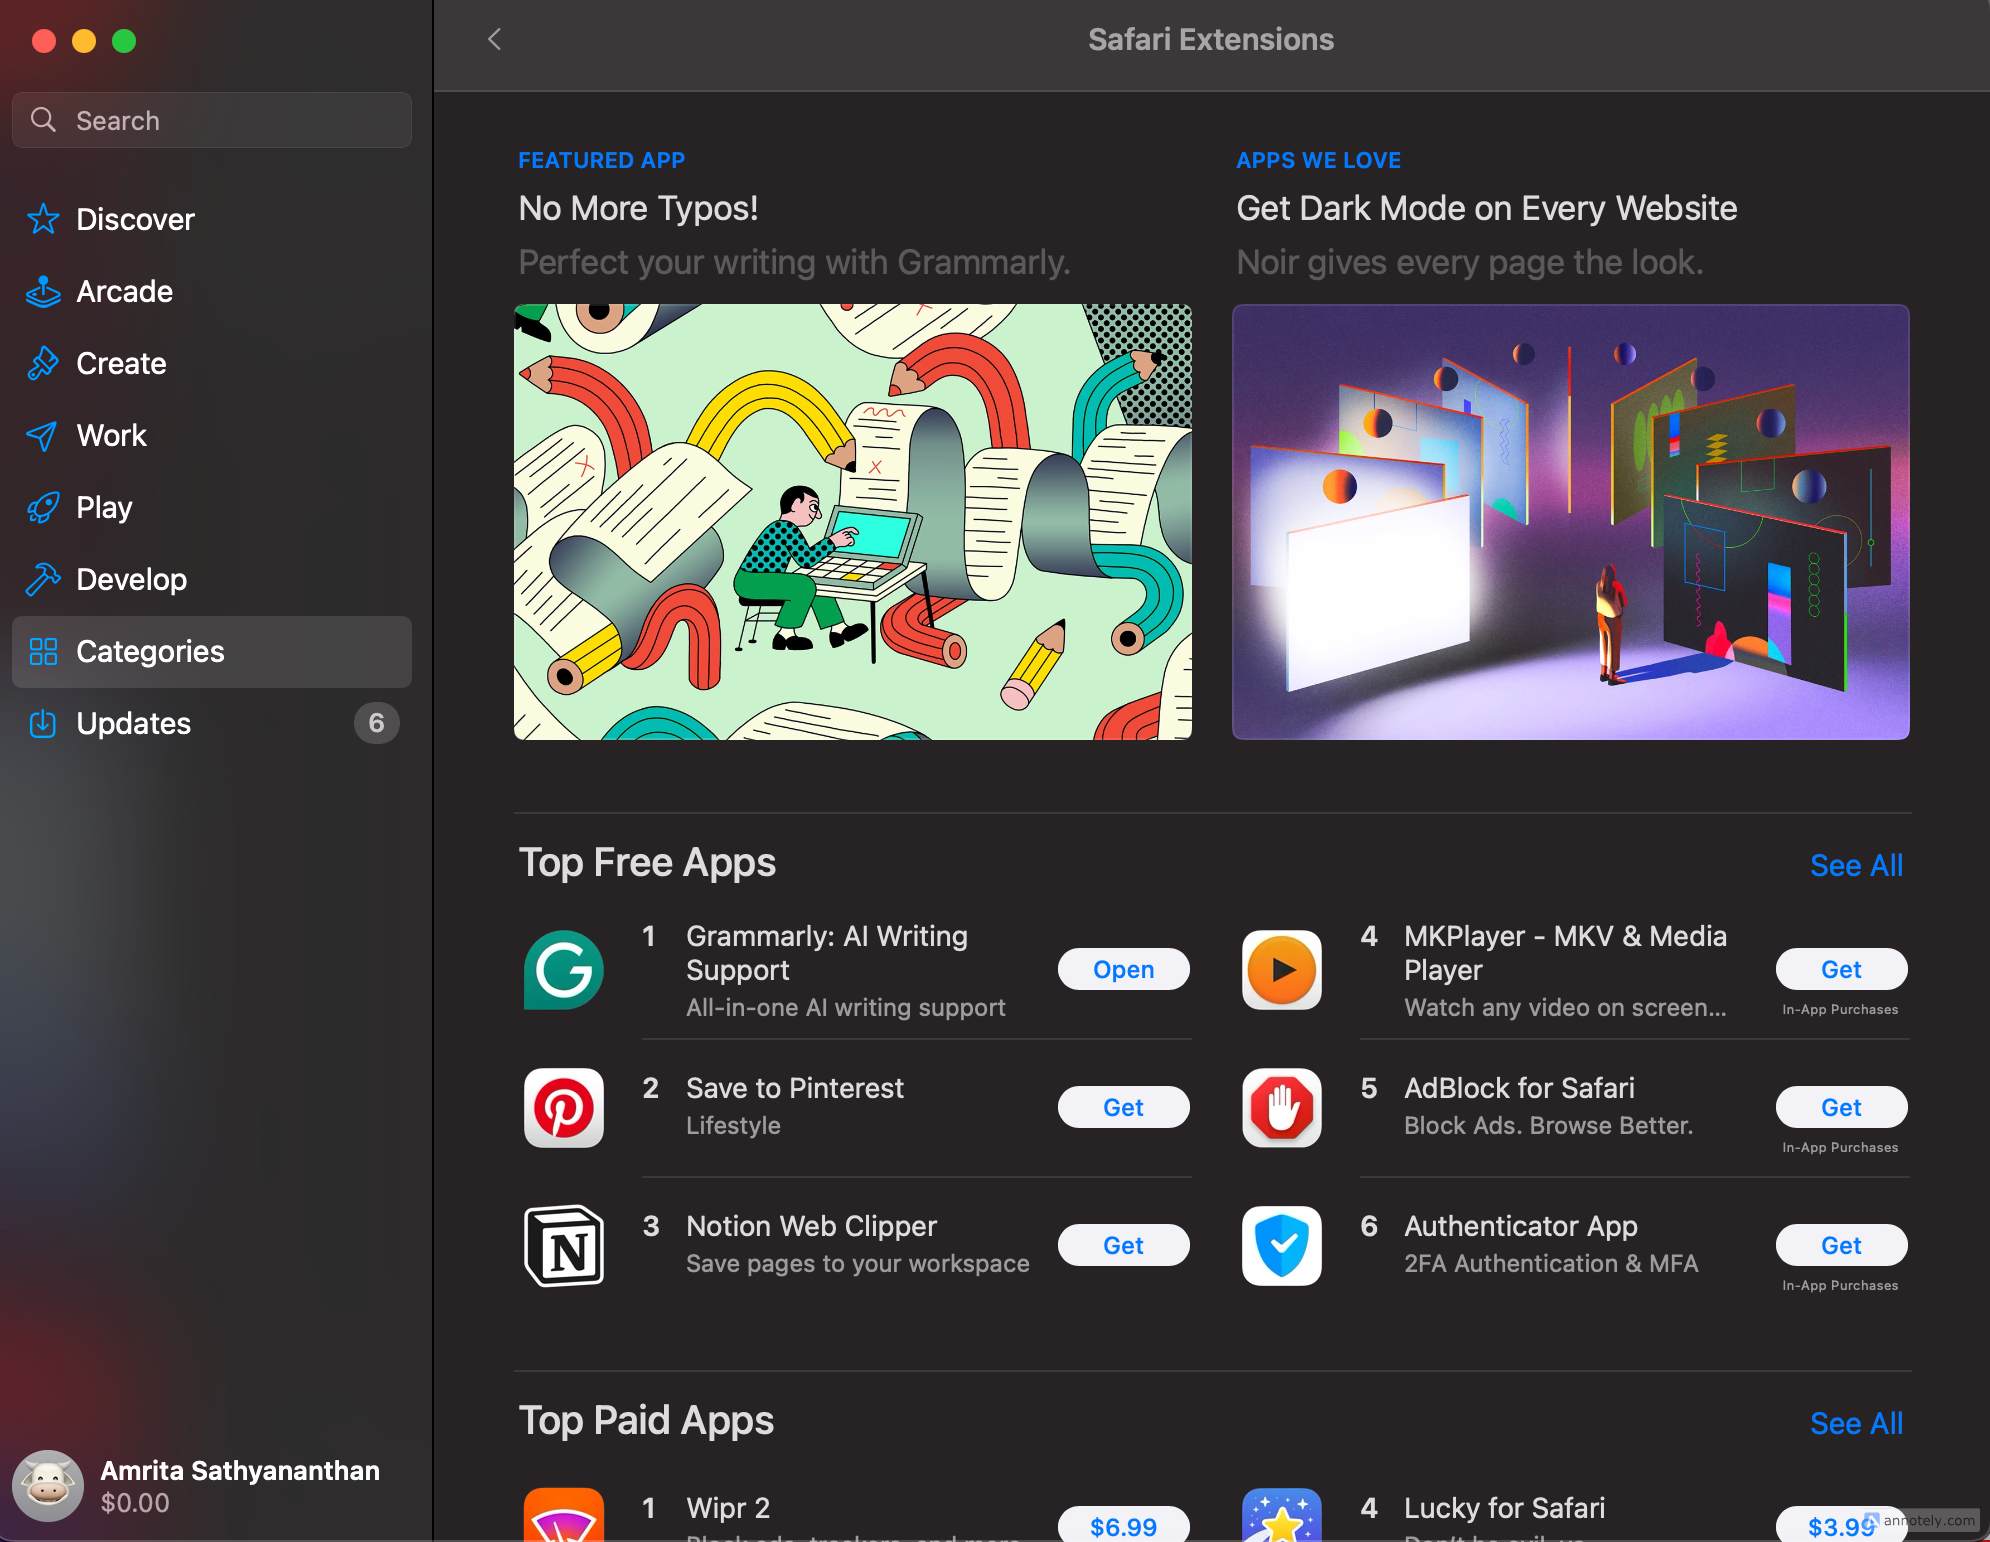
To browse through extensions, open the App Store on your Mac. Navigate to “Categories” and click on “Safari Extensions.” Here, you will find extensions that can help you be more productive, block distractions, find discounts while online shopping, and more. You can also click Safari > Safari Extensions at the top of the screen.
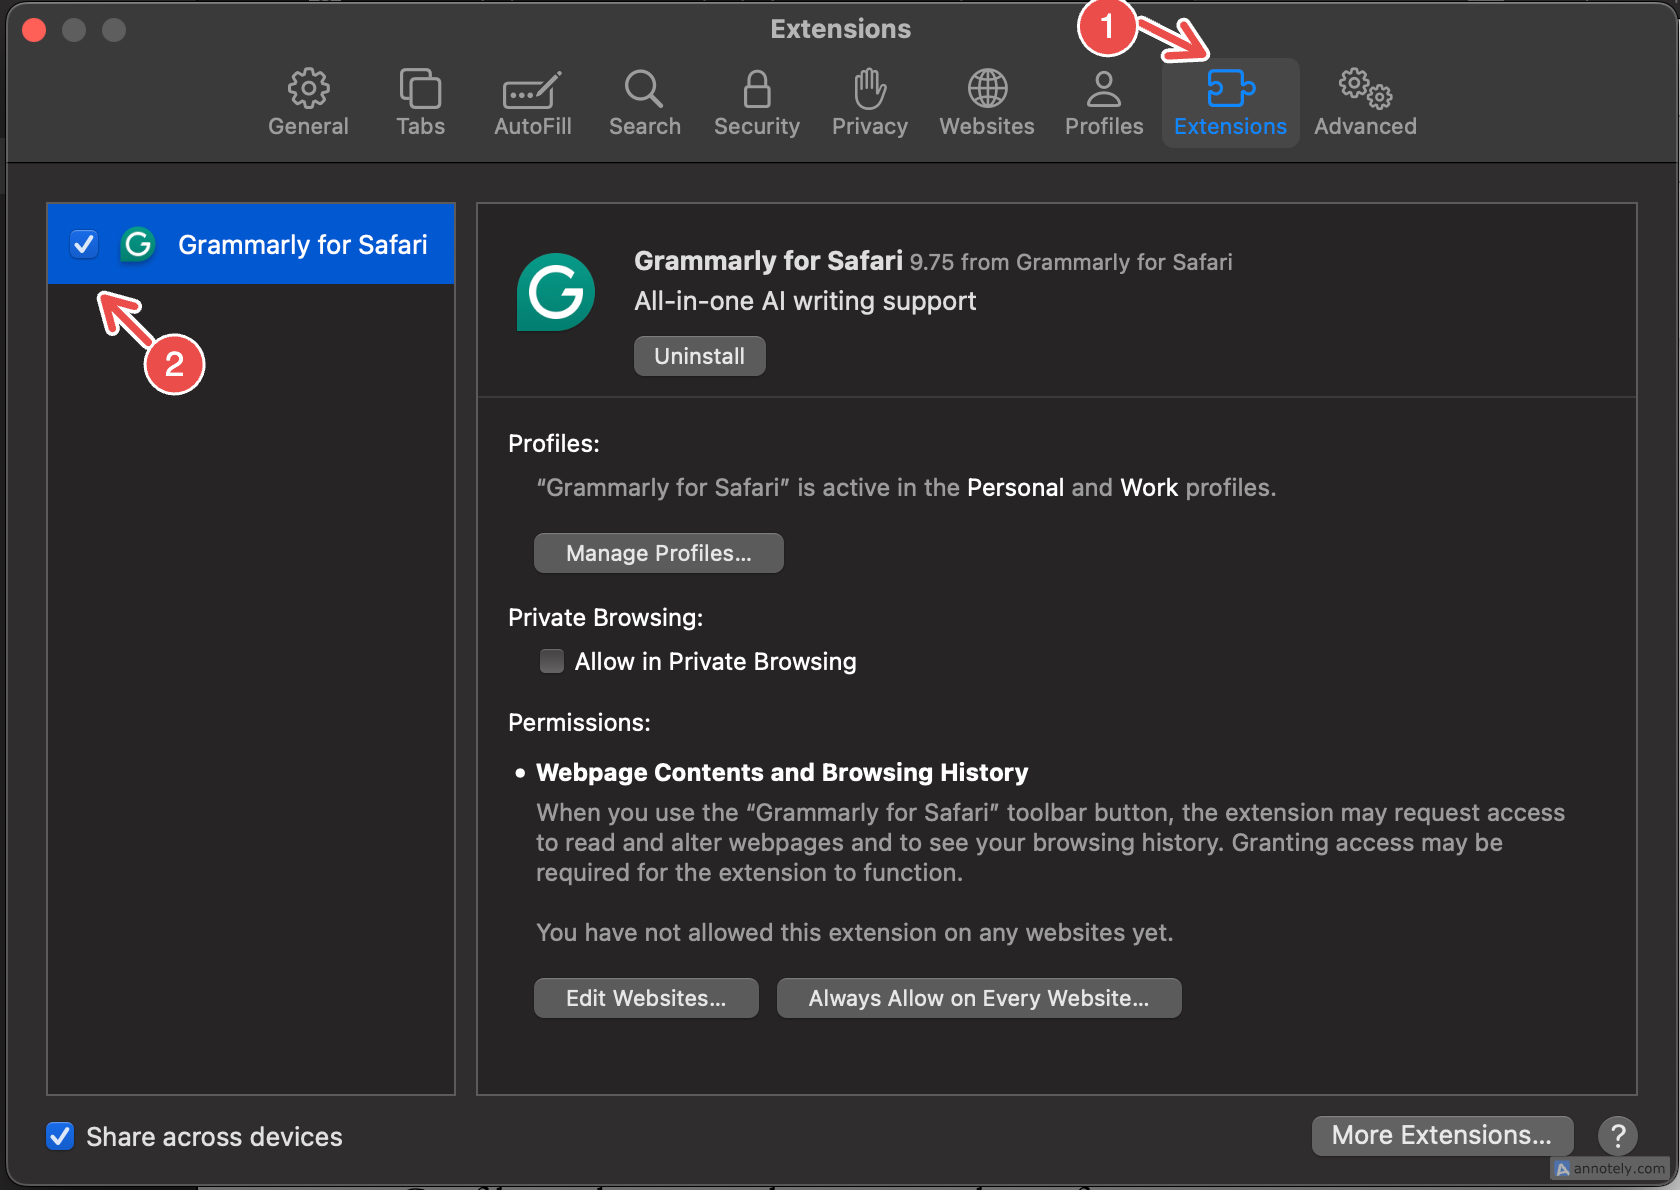
You can install the extension like you would an app. To turn on the extension for your browser, open Safari then click Safari > Settings > Extensions and click the box next to an extension’s name to start using it.
Move to Apple’s Passwords App
Moving to Apple’s Passwords app makes life in Safari easier in terms of saving passwords, updating weak ones, and keeping track of all your website passwords. This native app syncs your passwords across Apple devices, with autofill also working in other apps. Learn how to migrate to Apple Passwords on your Mac.
Autofill is a feature that I’ve been using on Safari that saves me time and energy trying to remember passwords. The Passwords app also lets you create, save, and use passkeys, or share your passwords with a Shared Group.
If you make online purchases, you can use iCloud Keychain to securely store and use your credit card information. Head to Safari > Settings > Autofill to set this up.
Create Organized Tab Groups and Profiles
One thing I like about Safari is how easy it is to stay organized and create an uncluttered workspace. If you’re like me and like to keep multiple tabs open at the same time, then tab management is something you’re particular about. With Safari, creating organized tab groups that are retained even after you close the app will help you manage your web pages.
To use tab groups, open a new tab. On the menu to your left, an “Untitled” tab group will be visible. To create a new tab group, click “New Empty Tab Group” on this menu. You can click the “+” (plus) sign to your right to add multiple tabs to a tab group of your choice.
To name or rename a tab group, double-click on the tab group name. You can delete existing tab groups by clicking on the three dots next to a tab group’s name and tapping “Delete.”
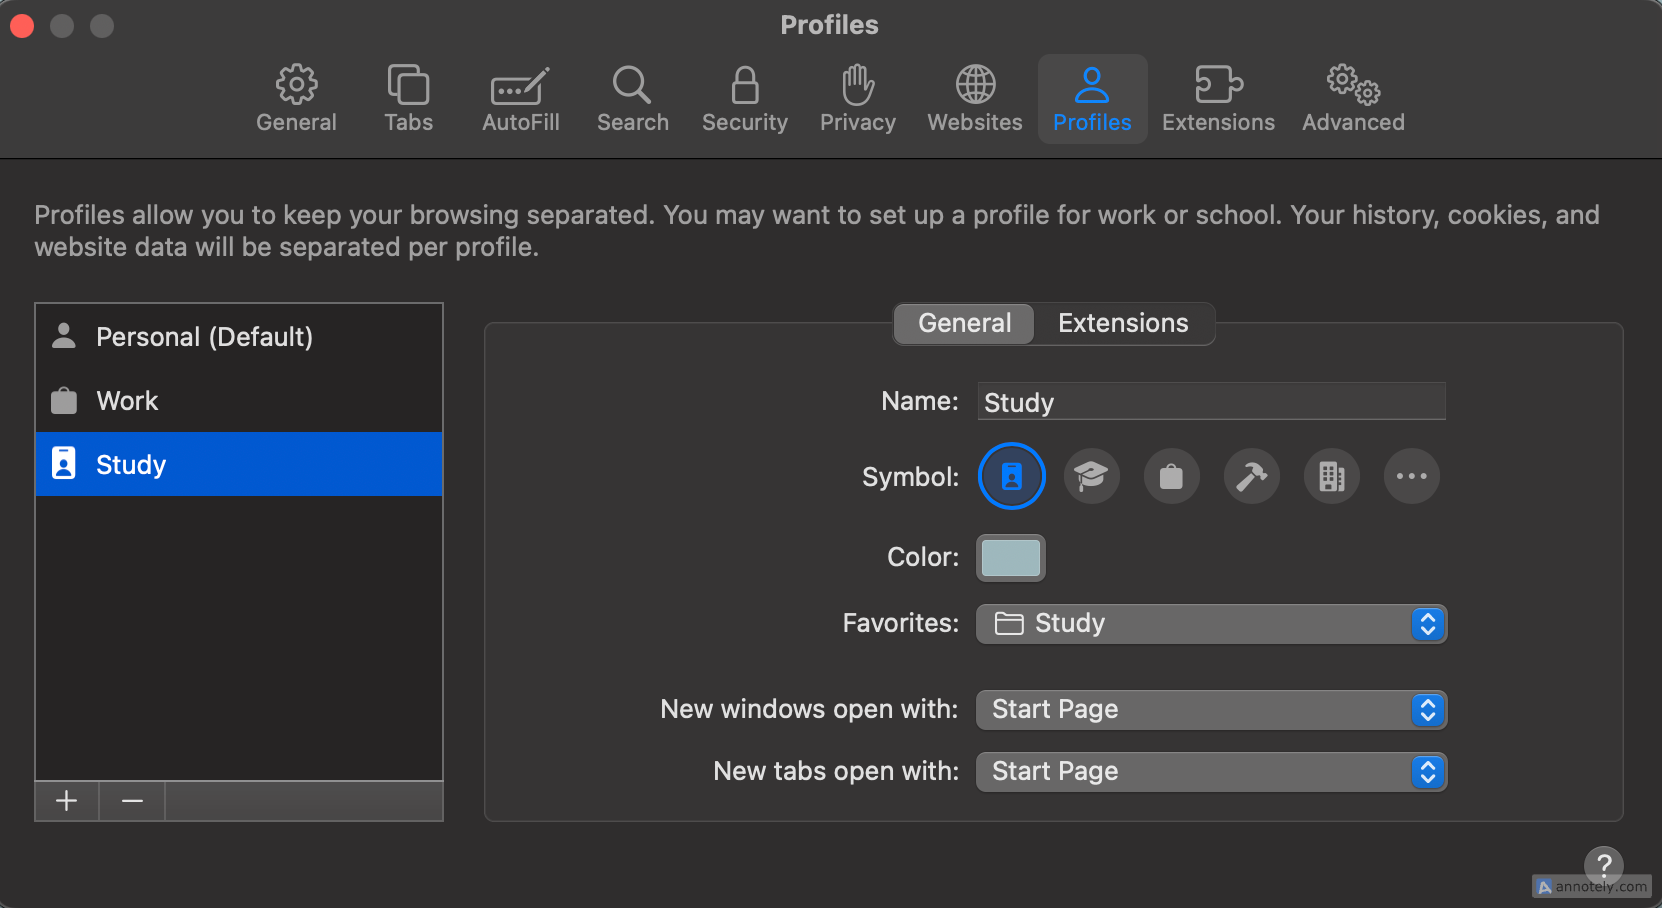
Safari also allows you to create multiple profiles for different purposes. You can use personal (default), work, study, and other custom profiles, which will keep your browsing data separate. This includes your browsing history, extensions, tab groups, cookies, and data.
If you want to separate web pages without using Safari’s Private Browsing feature, then profiles can help you filter and organize different aspects of your browsing. It’s much easier to handle multiple logins for the same services this way.
To create a profile on Safari, go to the menu bar and click on Safari > Create Profiles or Manage Profiles (if you’ve already added a profile). Here, name, color tag, and manage a new profile.
Get to Know Safari’s Features
Once you are settled in, a final step in your transition from Chrome to Safari is to get familiar with Safari’s built-in features.
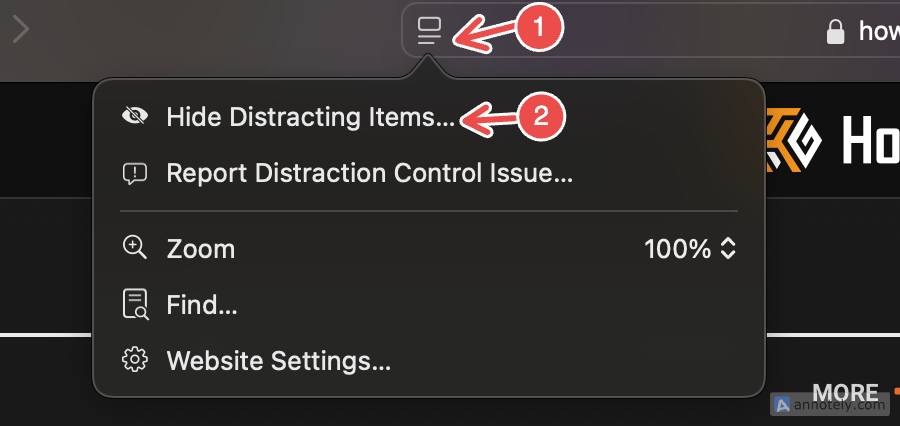
Distraction Control is one of my favorite features and takes away the need to install a third-party extension that could help curb distracting pop-ups and ads. To use this feature, open a web page on Safari and click the website settings button on the address bar.
Now, click “Hide Distracting Items” and tap on any pop-ups, ads, videos, or elements that you want to remove from your web page. Once you’re finished, click “Done.” This makes the elements vanish and leaves behind blank space, stripping your Safari web pages of any distracting items.
With Safari, you can also enjoy seamless sync across your Apple devices when you sign in with the same iCloud account. This means that you can open a Safari tab on your Mac, then open Safari on your iPhone or iPad and pick up where you left off. Your bookmarks, Reading List, and tab groups are part of this sync, making it convenient to switch smoothly between devices while browsing with Safari.
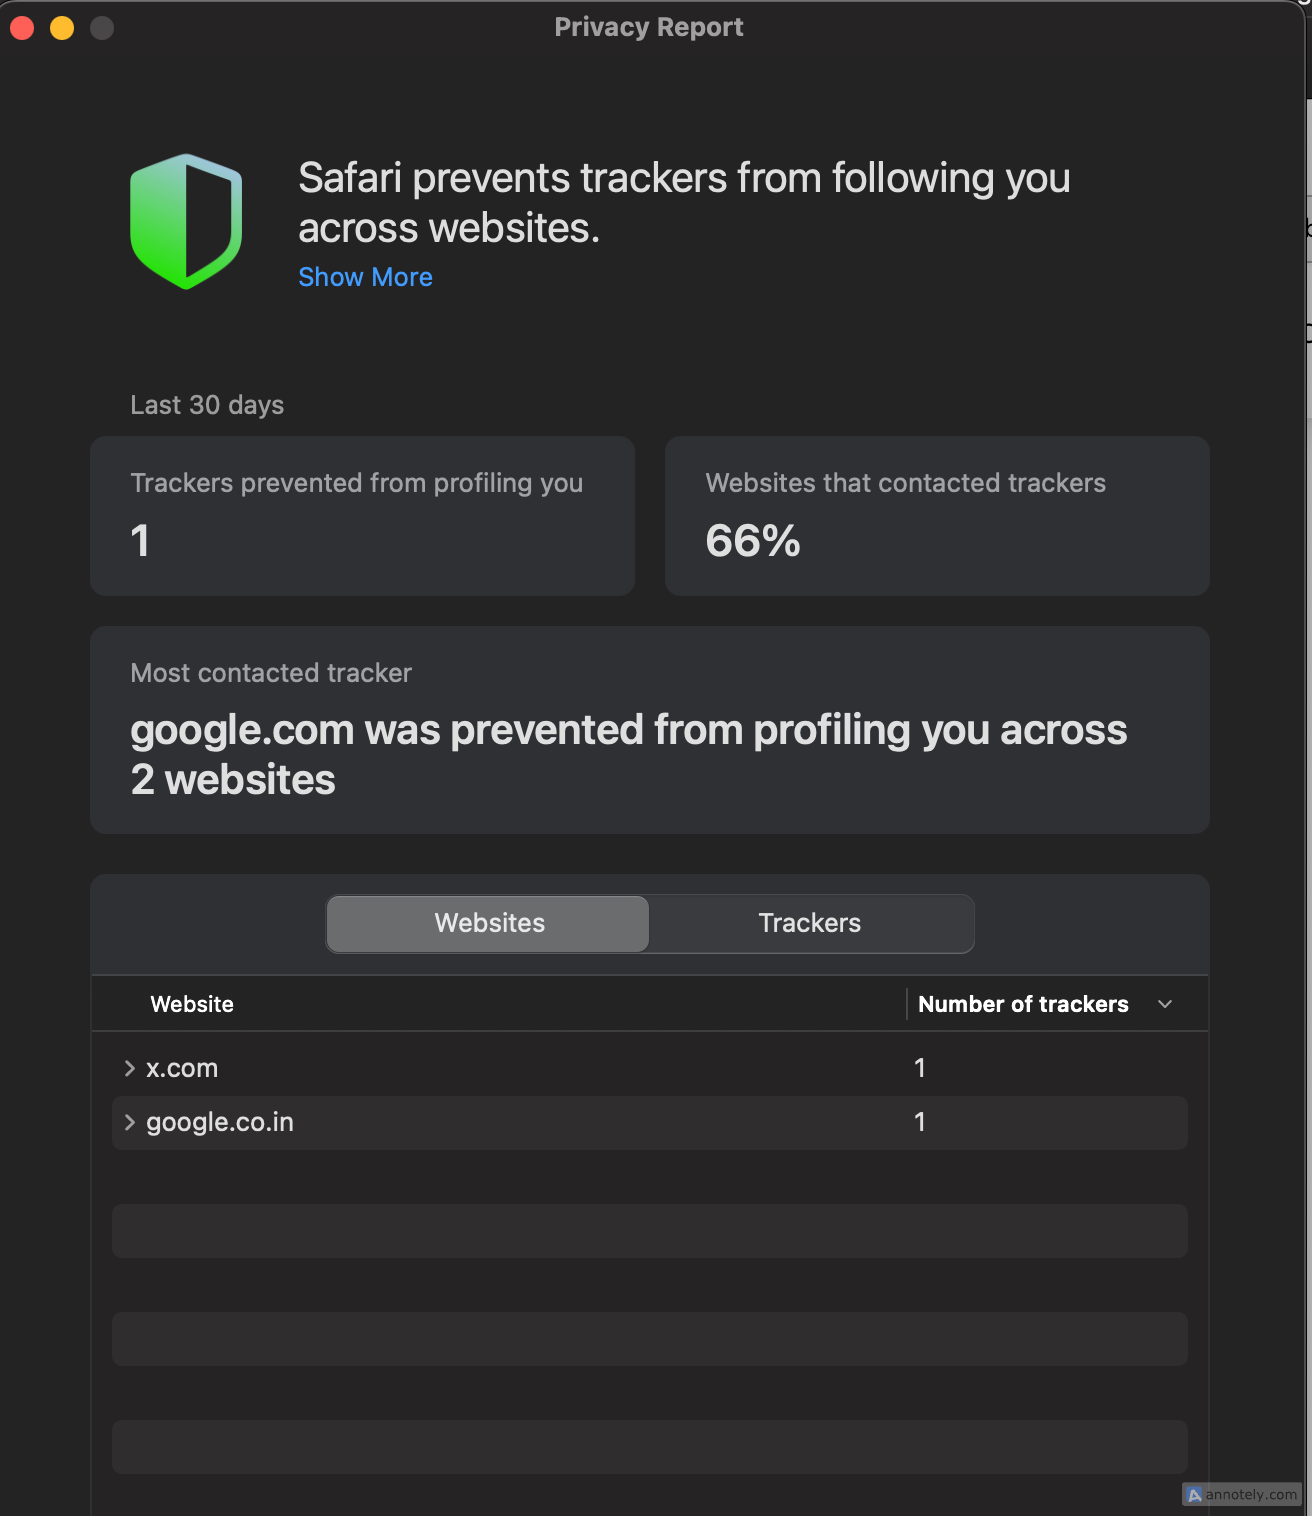
An important privacy feature that you may want to check out is Privacy Report. This helps you know which third-party trackers have been blocked by Safari. To view your Privacy Report, open the Safari app and go to the desktop menu. Click Safari > Privacy Report.
Making the transition from Chrome to Safari can be hard, but it doesn’t need to be a cold turkey switch. Consider taking time to get familiar with Safari’s interface and features before you jump into the deep end. Looking for some extra motivation to stop using Google’s browser? Learn why you should ditch Chrome today.

