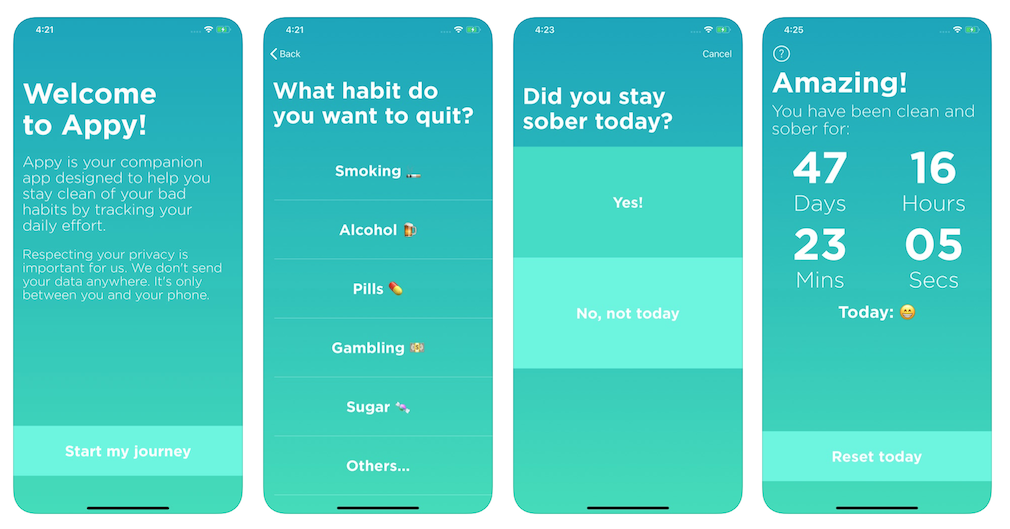
To move an existing iOS app codebase to SwiftUI can quickly become a challenge if we don’t scope the difficulties ahead. After covering the navigation and design layer last week, it’s time to dive deeper into the logic and handle the code migration for a database and the user preferences.
If you’ve missed it, have a look at the first part, covering navigation and storyboards.

My current app relies on two type of data storage: a database for the user’s content and another storage fo the app preferences. We’ll look into moving the existing logic to a more friendly integration to SwiftUI.
User Defaults
For app preferences, UserDefaults is almost always the “go to”. It’s a good fit for non sensitive data or content that doesn’t require to be persisted on a very long term.
In my previous version, I created a struct to wrap around the UserDefaults and makes it easier to handle the key access. However, for SwiftUI content, to send and observe new values, it requires to convert it to an ObservableObject which also requires a class.
// old code
struct UserHelper {

    static var isOnboarded : Bool {
        get {
            return UserDefaults.standard.bool(forKey: "onboard")
        }
        set {
            UserDefaults.standard.set(newValue, forKey: "onboard")
        }
    }
}

// new code
class UserHelper: ObservableObject {

    @Published var isOnboarded: Bool {
        didSet {
            UserDefaults.standard.set(isOnboarded, forKey: "onboard")
        }
    }

    init() {
        isOnboarded = UserDefaults.standard.bool(forKey: "onboard")
    }
}
When initialized, I want to make sure I had the latest values, but when setting a new one, I want ideally that the current observer and the record are both been updated.
On the view layer, the AppDelegate handled the user flow to know what view controller to present (remember the app is very small, I wouldn’t advise this at scale). I need to do something very similar for my SwiftUI App structure.
Good thing is that SwiftUI has its own property wrapper to observe UserDefaults which is @AppStorage.
@main
struct AppyApp: App {
    @AppStorage("onboard") var isOnboarded = false

    var body: some Scene {
        WindowGroup {
            NavigationView {
                if !isOnboarded {
                    OnboardingFirstView()
                        .navigationBarTitleDisplayMode(.inline)
                } else {
                    DashboardView()
                        .navigationBarTitleDisplayMode(.inline)
                }
            }
        }
    }
}
That makes my life much easier. When the value changes (and it should change only from false to true), the app will automatically update the main view of our navigation stack.
On the downside, we don’t have a real control about the transition, so it can feel a bit jumpy when the onboarding is completed.
The rest of the user preferences will be handled similarly, we can move on to the database with Realm.
Database with Realm
The app is designed to help people quit their bad habits, so the user needs to log his progress on daily basis. These records are added to a local encrypted database. For this, I’ve used Realm database.
The very first step is to update the data model to use a unique identifier. It was implicit before, but with SwiftUI, it’s important to highlight it to make identifiable later on.
import RealmSwift
class Activity : Object, ObjectKeyIdentifiable {
    /// The unique ID of the Item.
    @objc dynamic var _id = ObjectId.generate()
    @objc dynamic var name : String = ""
    @objc dynamic var isActive = false
    let logs = RealmSwift.List<Log>()

    override class func primaryKey() -> String? {
        "_id"
    }

   // ...
}
I use to have a specific class to handle all the data transactions, either for reading or writing. It also helped me initialize the database for the first launch.
Since the goal is to integrate it to SwiftUI, moving this logic to use Combine framework instead of closures does make sense, hoping to take advantage of the chaining of events and asynchronous requests.
Here is the higher level.
import RealmSwift

// old code
protocol ActivityDatastoreProtocol {
    var activeActivity : Activity? { get }

    func getActivities() -> Results<Activity>
    func addActivity(_ title: String, completion: ((Bool) ->())?)
}

// new code
protocol ActivityDataStorageObservable {
    var activeActivity: Activity? { get }

    func getActivities() -> AnyPublisher<[Activity], Never>
    func addActivity(_ title: String) -> AnyPublisher<Void, Error>
}
Since writing into the database can fail, I’ll take advantage of the Fail and failure() signal to raise the error and terminate the stream of events.
class DataStorage {
    private let realm: Realm
    private var cancellables: Set<AnyCancellable>

    init() {
        realm = try! Realm()
        cancellables = Set<AnyCancellable>()
    }

    // ...

    private func write(writeClosure: @escaping (Realm) -> ()) -> AnyPublisher<Void, Error> {
        Future { [weak self] promise in
            guard let self = self else {
                return promise(.failure(NeverError.never))
            }

            do {
                try self.realm.write {
                    writeClosure(self.realm)
                }
                return promise(.success(()))
            } catch {
                print("Could not write to database: ", error)
                return promise(.failure(error))
            }
        }
        .eraseToAnyPublisher()
    }
}
I chose Future here because it felt a bit more elegant to handle success and failure content. However, it requires to weakify self to avoid keeping a strong reference to my class. There were other alternatives, using Just and Fail like the following to avoid creating extra closures.
// alt code
private func write(writeClosure: (Realm) -> ()) -> AnyPublisher<Void, Error> {
    do {
        try realm.write {
            writeClosure(realm)
        }
        return Just(())
            .setFailureType(to: Error.self)
            .eraseToAnyPublisher()
    } catch {
        print("Could not write to database: ", error)
        return Fail(error: error)
            .eraseToAnyPublisher()
    }
}
You might notice that it also need an extra care to handle the error even when it succeed. Well, since we specified an AnyPublisher<Void, Error>, the compiler is expecting an error type returned, where Just should never fail and uses Never, so it won’t compile as is.
I found different solutions to work around, one is changing the type like above, but you could map the error to a custom one or create a specific Result.Publisher.
// option 2
return Just(())
    .mapError({ _ in NeverError.never })
    .eraseToAnyPublisher()

// option 3
return Result.Publisher(.success(()))
    .eraseToAnyPublisher()
There might be more solutions, I’ll let you decide what fits best.
Then we can wrap up the implementation.
extension DataStorage: ActivityDataStorageObservable {
    var activeActivity: Activity? {
        realm.objects(Activity.self)
            .filter({ $0.isActive })
            .first
    }

    func getActivities() -> AnyPublisher<[Activity], Never> {
        Just(realm.objects(Activity.self))
            .map({ Array($0) })
            .eraseToAnyPublisher()
    }

    func addActivity(_ title: String) -> AnyPublisher<Void, Error> {
        write { realm in
            realm.create(Activity.self, value: [ObjectId.generate(), title])
        }
    }
}
Regarding Results in Realm SDK, if it’s for a listing view only, I would suggest to use freeze() to make sure the data record stays immutable, but in my case getActivities() will help defined what activty is active for the rest of the app usage, so I’ll use without.
The class is now reactive, I can start using it through my project.
SwiftUI & Realm
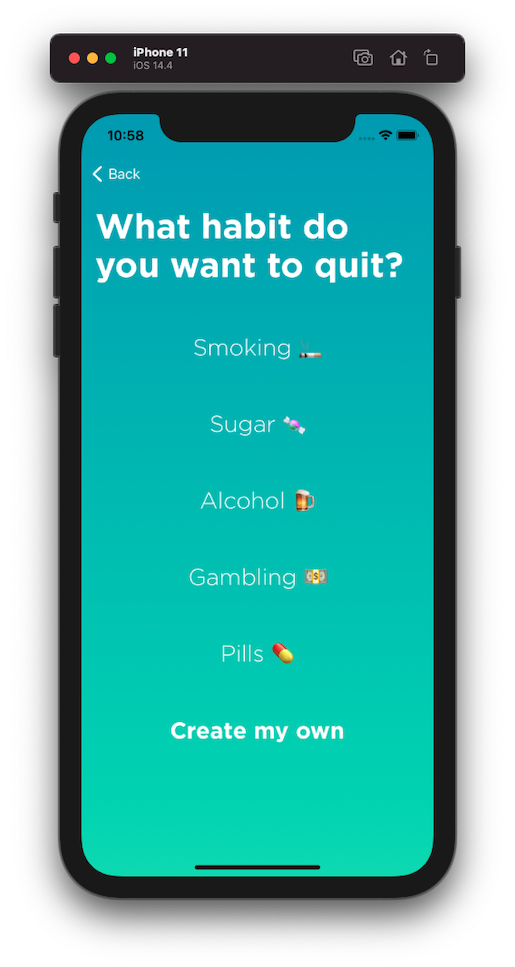
Back to the view layer, the first step will be to list the available activities during the onboarding. I will also need to set the selected one as active.
For this part, I’ll follow an Input/Output approach where the selected item will be our input, and the list of activities our output.
class OnboardingViewModel: ObservableObject {
    let selectedItem = PassthroughSubject<Activity, Never>()

    @Published var activities: [Activity] = []


    @AppStorage("onboard") var isOnboarded = false
    private let dataStorage = DataStorage()
    private var cancellables = Set<AnyCancellable>()
    init() {
        setupBindings()
    }

    func setupBindings() {
        selectedItem
            .sink(receiveCompletion: { _ in },
                  receiveValue: { [weak self] activity in
                  // turn activity as active
                self?.userHelper.isOnboarded = true
            })
            .store(in: &cancellables)
    }

    func loadActivities() {
        dataStorage.getActivities()
            .assign(to: &$activities)
    }
}
We can finally bind the activities to our list.
struct OnboardingSecondView: View {

    @ObservedObject var viewModel = OnboardingViewModel()

    var body: some View {
        ZStack {
            defaultBackgroundView

            VStack(alignment: .leading, spacing: 30, content: {

                Text(L10n.onboardingChooseTitle.withNoOrphan)
                    .modifier(TitleModifier())

                ScrollView {
                    LazyVStack {
                        ForEach(viewModel.activities) { item in
                            ActivityRowView(activity: item)
                                .onTapGesture {
                                    viewModel.selectedItem.send(item)
                                }
                        }
                        createButton
                    }
                }
            })
            .padding()
        }
        .onAppear(perform: {
            viewModel.loadActivities()
        })
    }

    var createButton: some View {
        NavigationLink("Create my own", destination: AddActivityView())
            .font(.custom(AppFont.bold.name, size: 27))
            .foregroundColor(.white)
            .frame(maxWidth: .infinity, minHeight: 90, alignment: .center)
    }
}
One thing I really like here is to avoid using the constructor of my view to load the activities. I discover that we can make the view a bit smarter and rely on its life cycle using onAppear.
Since we don’t have UITableViewDelegate to handle the selection, I’ve used .onTapGesture to forward the selection back to the view model.
Finally, the ForEach will handle to display the activities. It works nicely here because the data model has its own identifier.
I’ll follow a similar approach throughout the rest of the project, to get the latest activity and records and add new one.

Before leaving, here is a couple of thoughts during this storage migration to keep in mind. If handling the user preferences was straightforward, Realm came with its own set of challenges and it mostly comes from the design architecture.
To be more reactive, I wanted to take advantage of Combine framework and make Realm’s highest implementation a bit better to observe and react to. However, that’s not what really happened in my code.
Even if reading and writing data is asynchronous, Realm SDK doesn’t return observables or closures like any observer design pattern.
I believe this is why we can find open source project to bridge the gap, like RxRealm for RxSwift and CombineRealm for Combine framework.
let realm = try! Realm()
let colors = realm.objects(Color.self))

RealmPublishers.array(from: colors)
  .addToRealm()
I believe that keeping my first data storage implementation without reactive layer could have been much easier to use. At the end, the view model passes the content via @Published which avoid exposing the heavy lifting to the view.
It’s important to know where you want to land before starting your own code migration to avoid creating layer of complexity. Remember, no silver bullet.
Of course, if you are using CoreData or any other framework, paired with any architectural design pattern, maybe it makes sense to be reactive with SwiftUI. It’s good to experiment in a smaller part of your code first to understand those limits.
In conclusion, we managed to read and write content using UserDefaults and Realm SDK and to store information for the app usage, still using SwiftUI and getting rid of old implementation when possible.
Last step would be to wrap up any leftover logic and getting into unit testing.
Happy coding.
